Quickstart
Build a workflow that drafts a reply to a customer message, waits for a person to approve it, and can be called from another service over HTTP.
| You will build | Start → LLM (draft a reply) → Human (approve it) → End |
| You will use | The editor, the state schema, a run trace, an API token and a schedule |
| Time | About 10 minutes |
| Video | The video on the home page follows the same steps |
Before you begin
- A running studio:
./dev.shfrom a clone of the repository (see Install). The UI is at http://localhost:5173. - An account: create one with Sign up on the sign-in page. The default
editorrole is enough for this guide. - No model key is needed. Without a credential, LLM nodes answer from a deterministic offline mock that echoes the end of the prompt.
1. Create a blank workflow
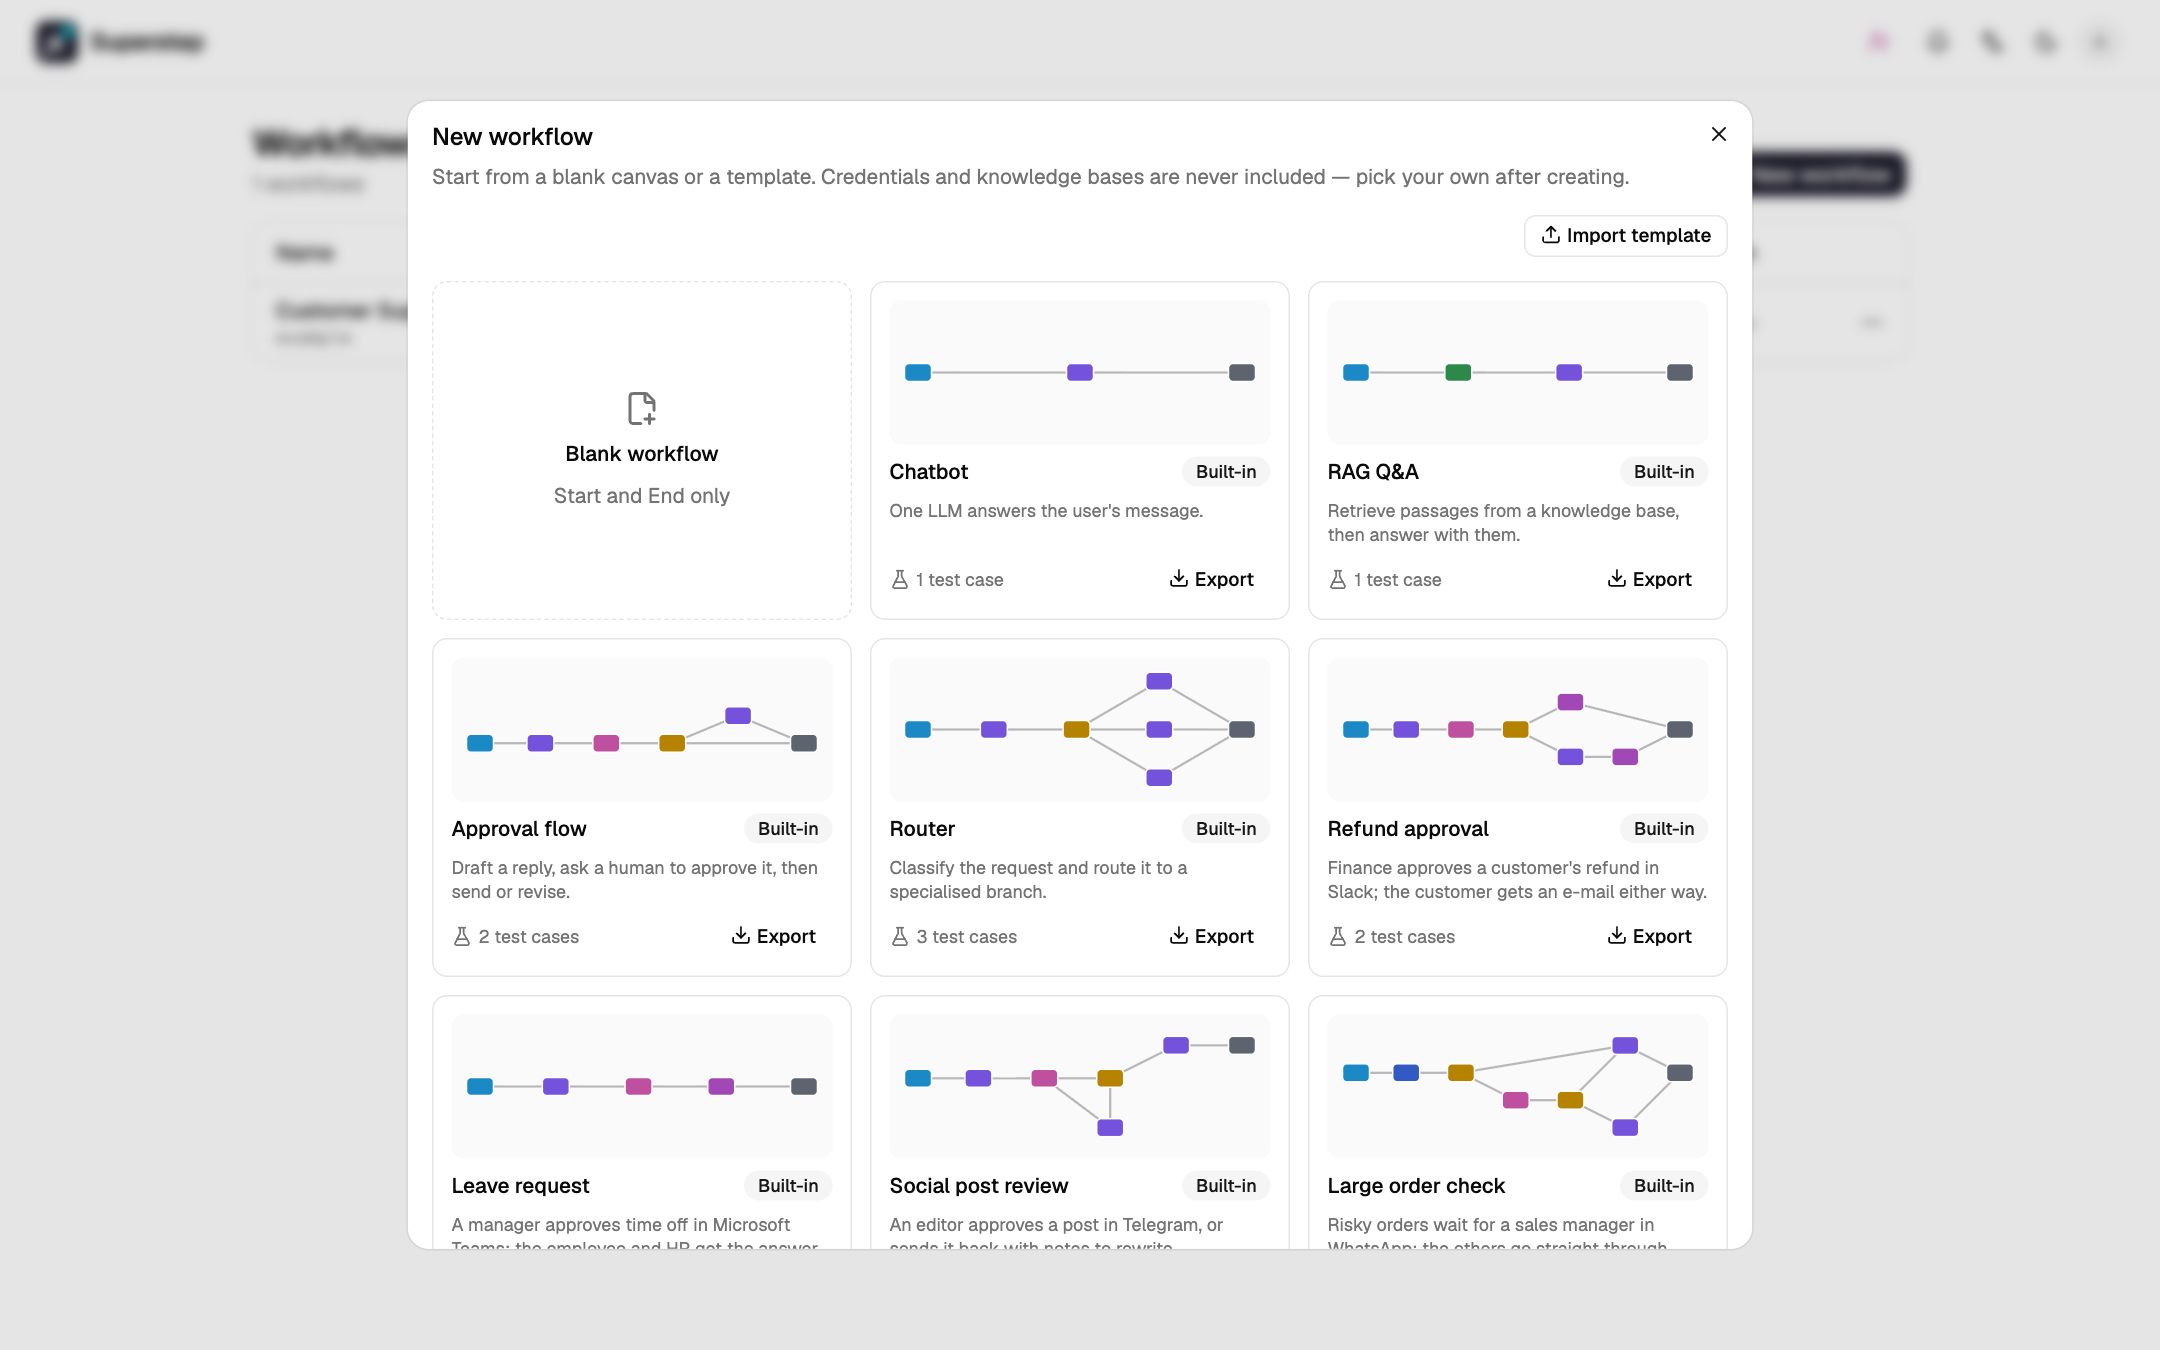
- On Workflows, select New workflow.
- In the gallery, select Blank workflow. The editor opens with a Start node, an End node and one edge between them.
- Rename it in the name field of the header, for example
Refund reply.
2. Add and connect the nodes
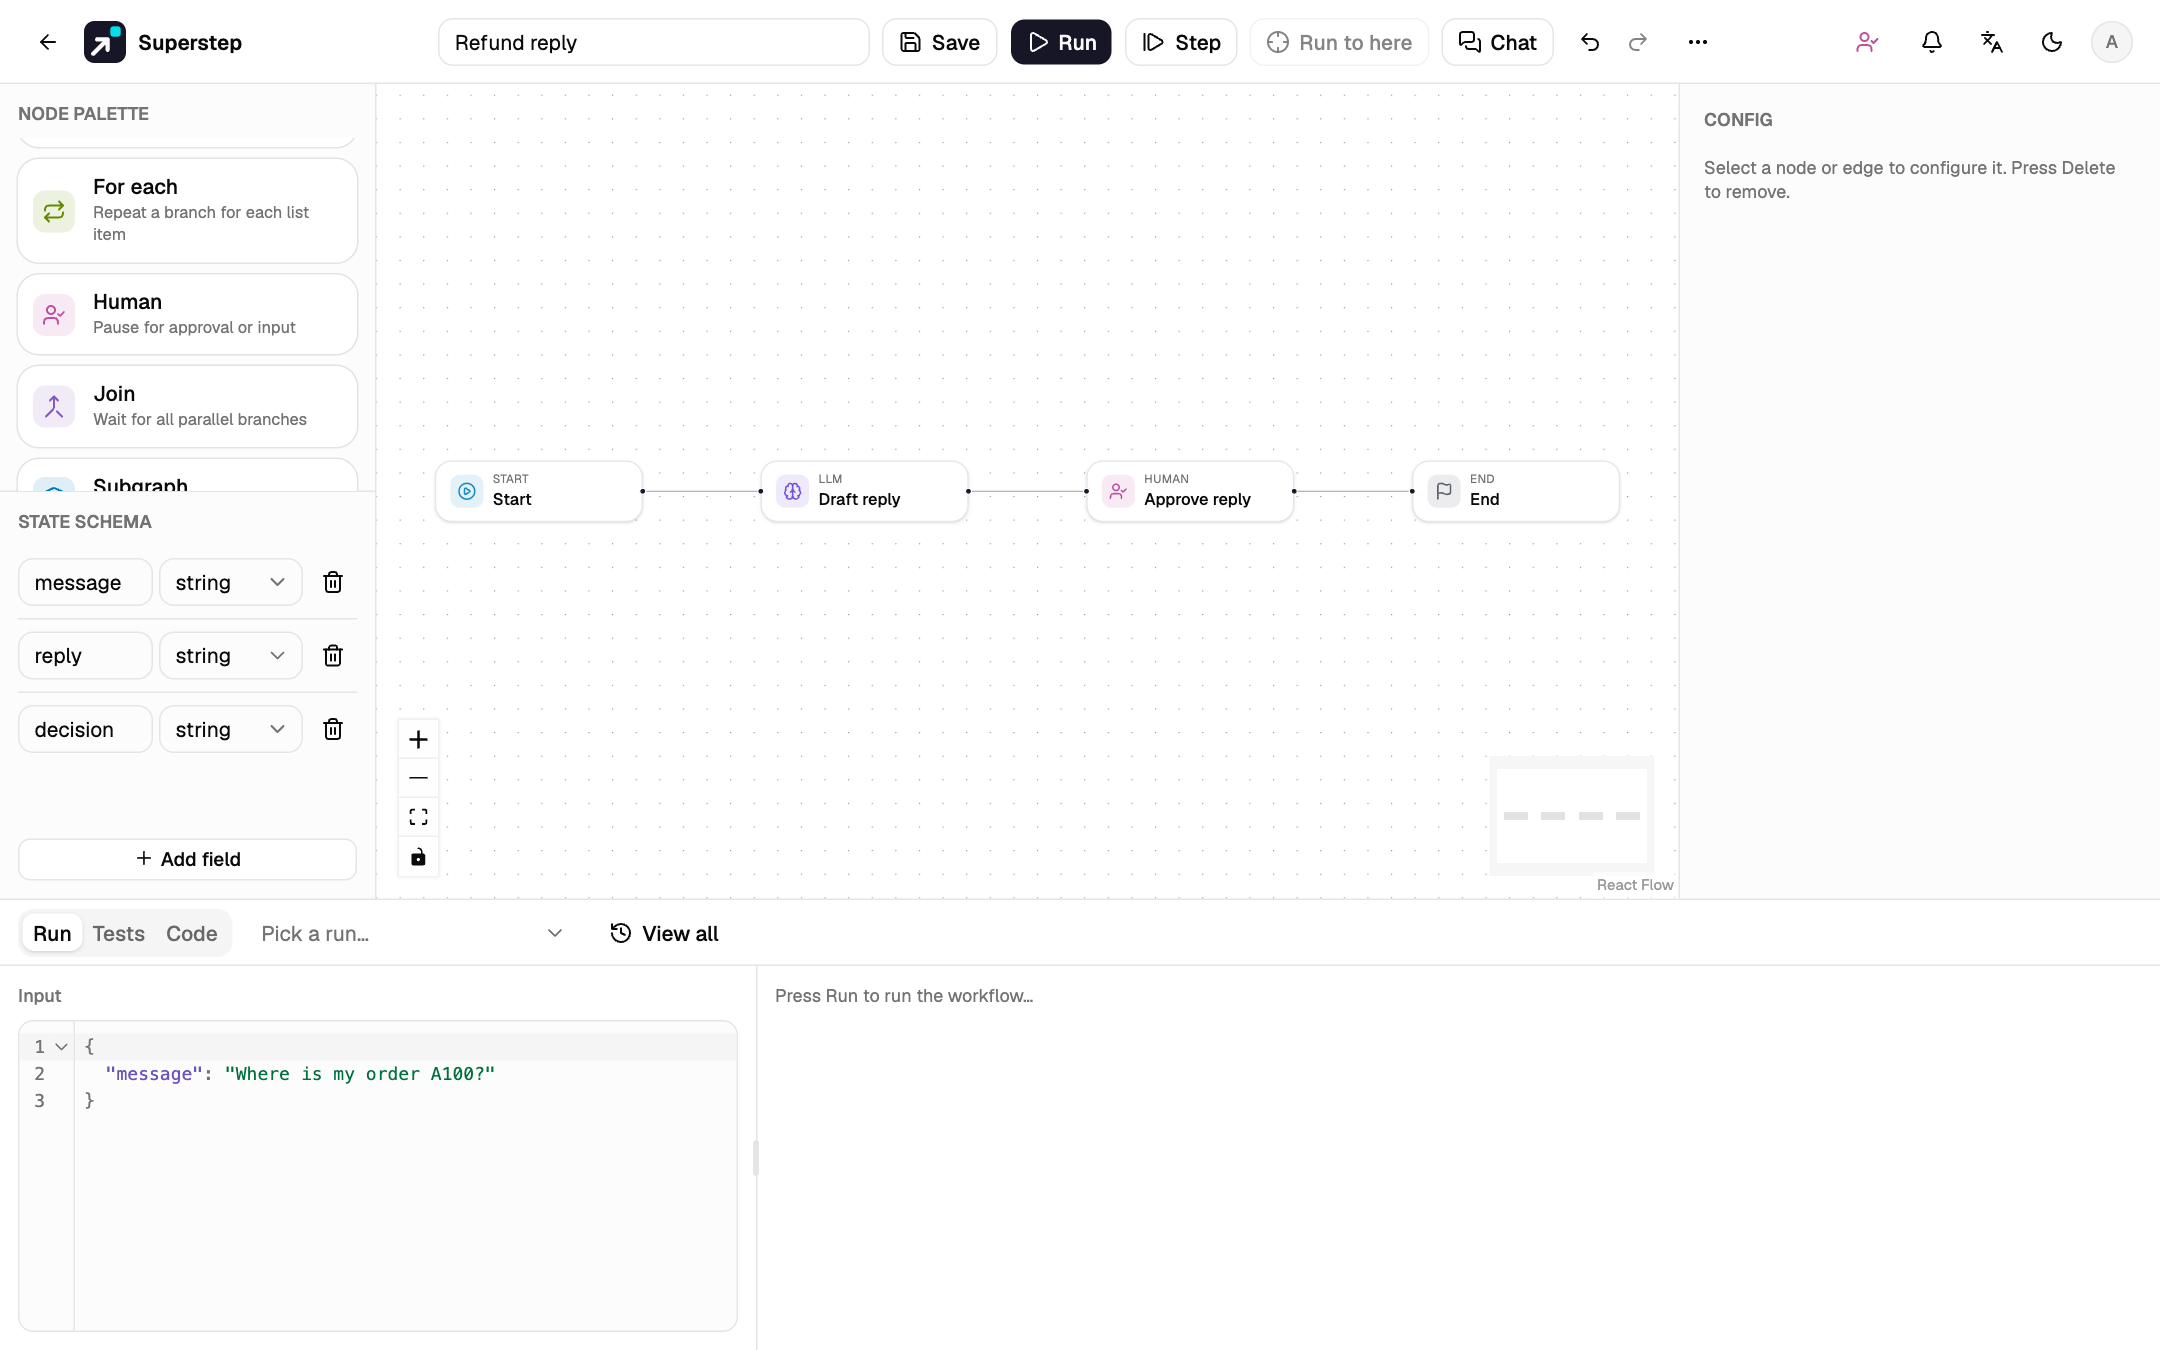
- Drag LLM from the Node palette onto the canvas. Scroll the palette down to Human and drag it next to the LLM node.
- Select the edge from Start to End and press Del.
- Connect the nodes: drag from the right handle of Start to the left handle of LLM, then LLM to Human, then Human to End.
- Press Shift+L to tidy the layout (also ⋯ → Tidy up the layout).
Check
The canvas shows four nodes in one row: Start → LLM → Human → End.
3. Configure the LLM node
The state is the typed record that every node reads from and writes to. A new
workflow has one field, message, which holds the run input.
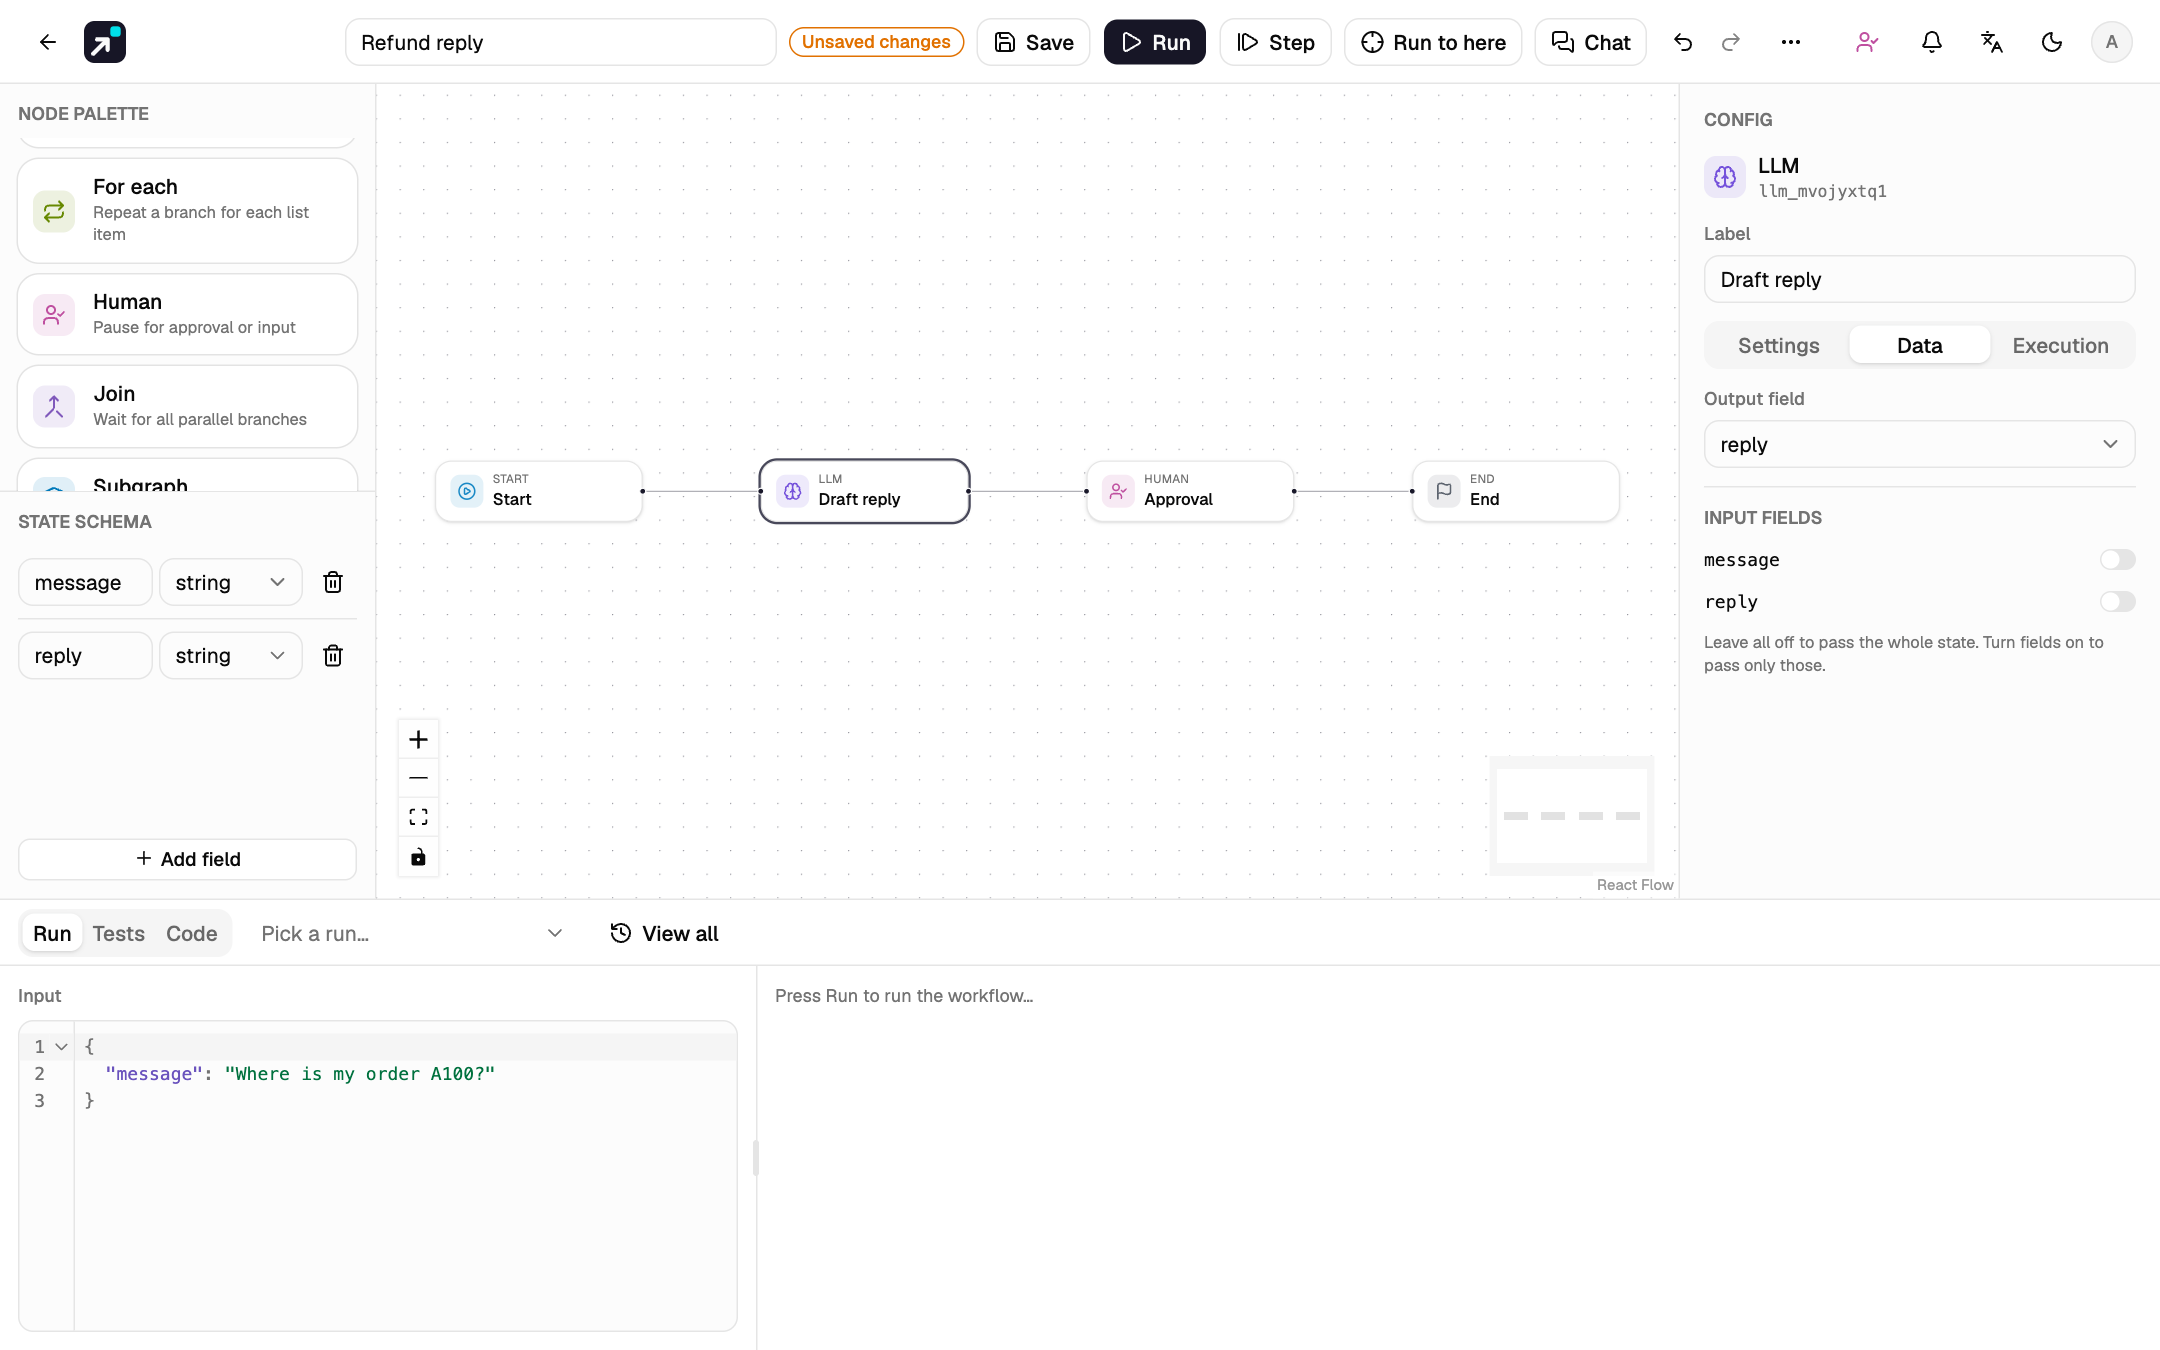
- Select the LLM node. Its settings open in the Config panel.
- Set Label to
Draft reply. -
Replace the Prompt template with:
{{state.message}}shows as a tag. Typing{{lists the state fields; a field that is not in the state is marked as unknown. -
Under State schema in the left panel, select Add field and name the new field
reply. - Open the Data tab and set Output field to
reply. The node writes its answer there.
4. Configure the Human node
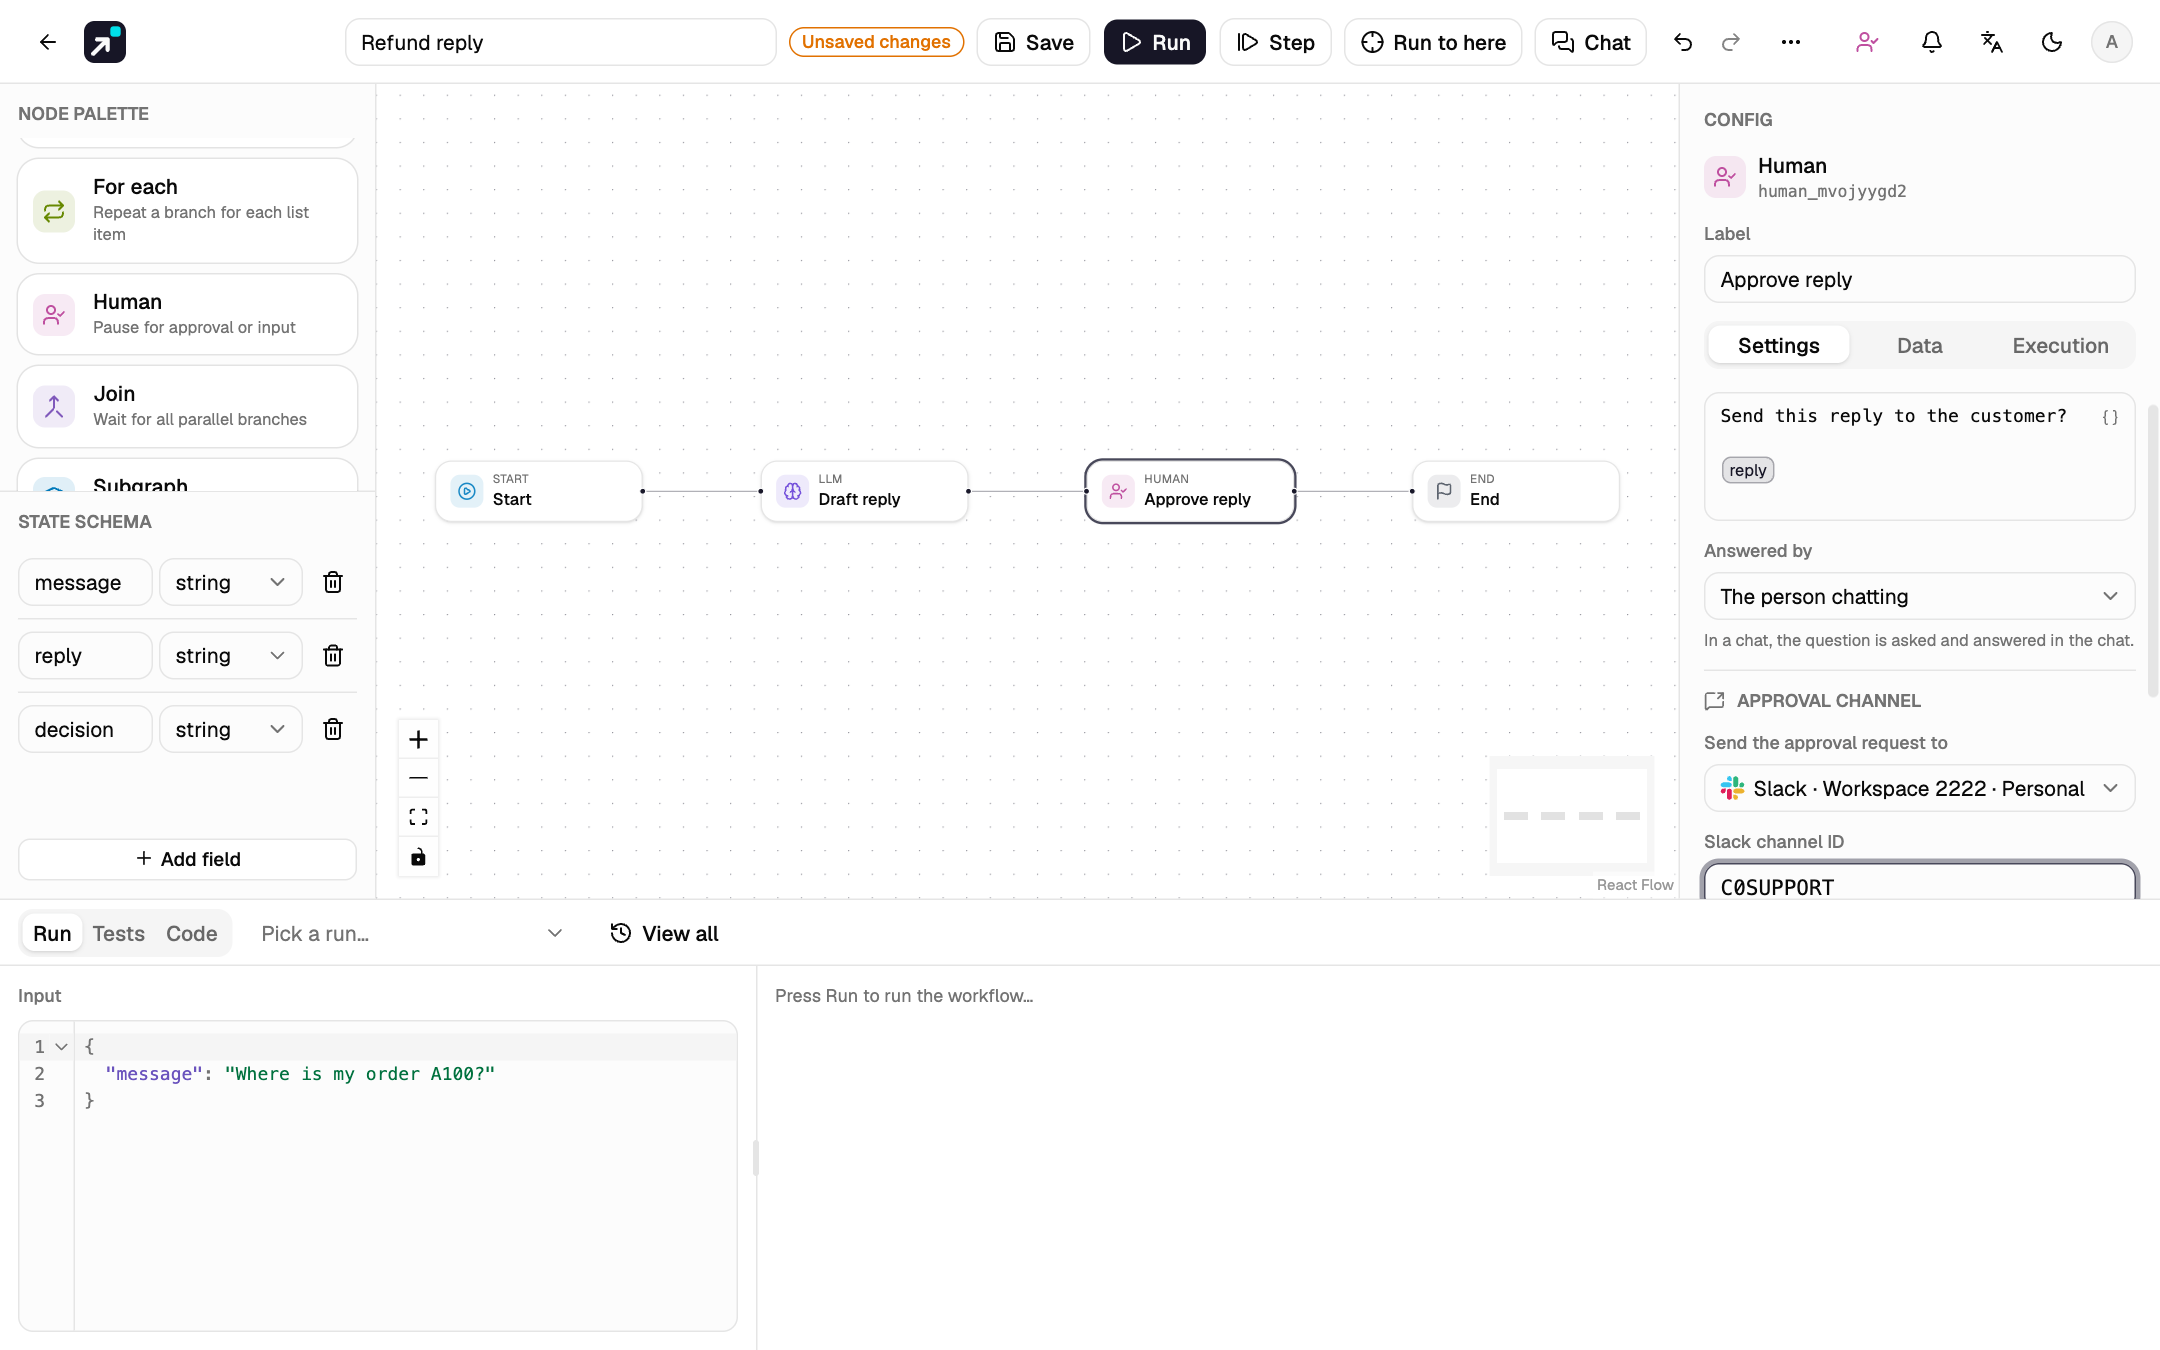
- Select the Human node and set Label to
Approve reply. -
Set Question for the human to:
-
Add a state field
decisionand, in the Data tab, set it as the Output field. It receivesapproved,rejectedor a typed answer. -
Optional: back in the Settings tab, under Approval channel, set Send the approval request to a connected Slack, Telegram, WhatsApp, e-mail or Teams channel, then its target (for Slack, the channel id). Approvers (e-mails) lists who else may answer. Channels are connected under Settings → Channels; see Approval channels. The quickstart works with Studio only.
-
Select Save (Ctrl+S or Cmd+S). The backend validates the graph and stores it as a new version.
Validation
Save and Run check the graph first: unreachable nodes, references to fields that are not in the state, and edges to missing nodes are listed before anything runs. See The editor.
5. Run it and approve
-
In the Run tab at the bottom, type into Input (left) and enter:
-
Select Run (Ctrl+Enter). The LLM node finishes, and the run stops at the Human node with status
waiting.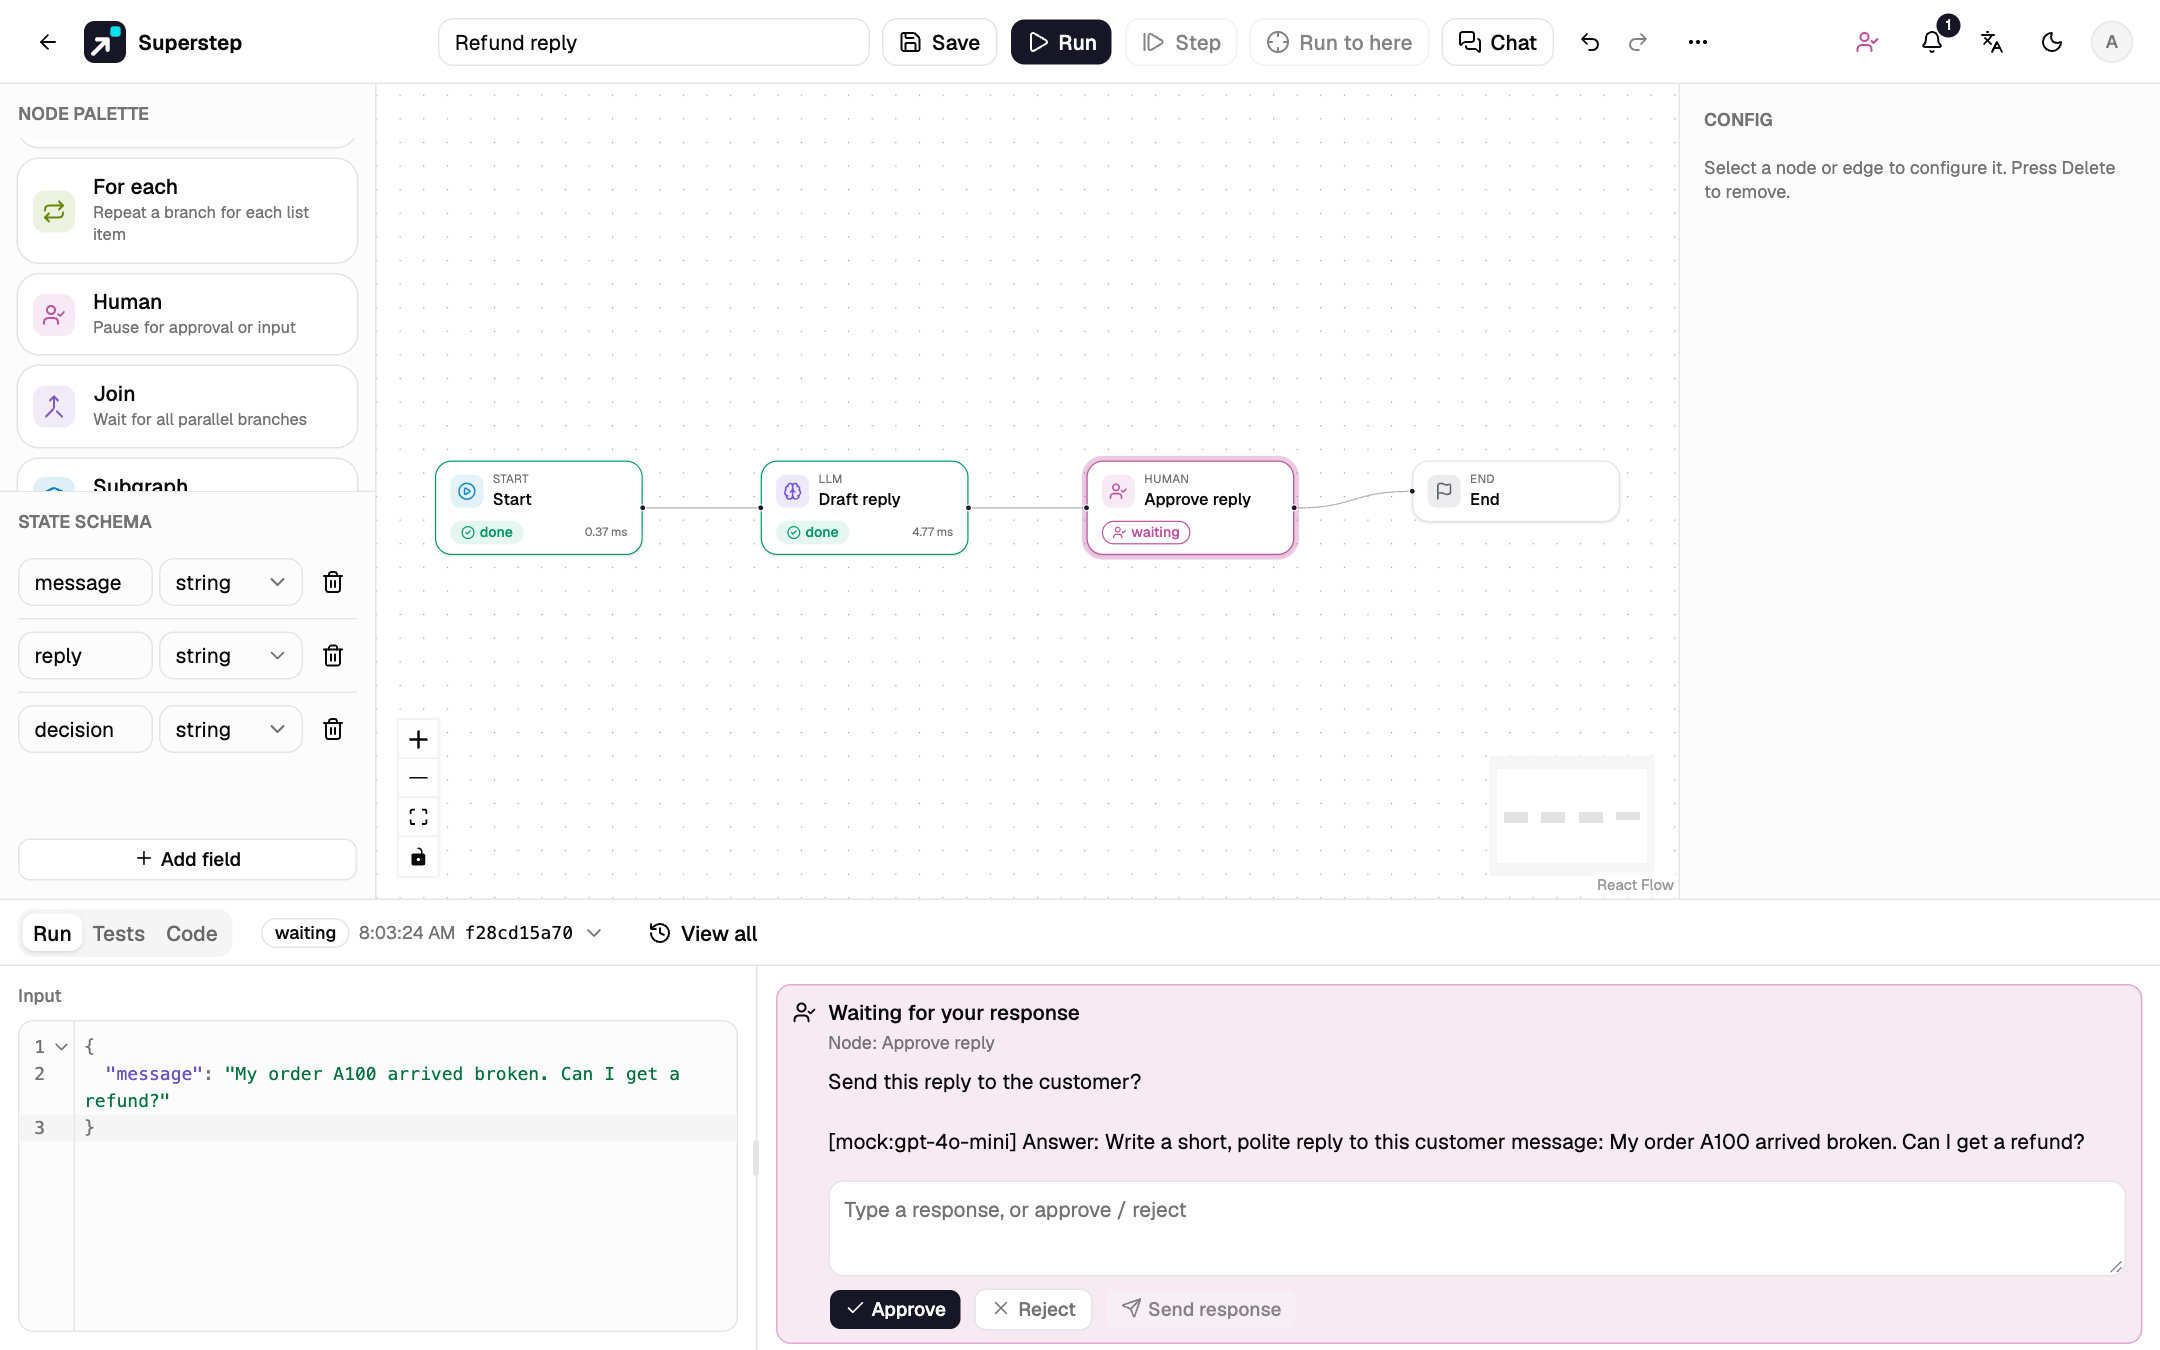
-
Read the question and the drafted reply, then select Approve. The run resumes from its checkpoint and finishes.
Answer from chat or e-mail
With a channel set on the Human node, the same request also goes there: Approve and Reject buttons in Slack and Telegram, two reply buttons in WhatsApp, and links in e-mail and Teams that open the studio. Only the run's owner and the listed approvers can answer, once. Answering in the studio closes the request everywhere. See Human approval.
Check
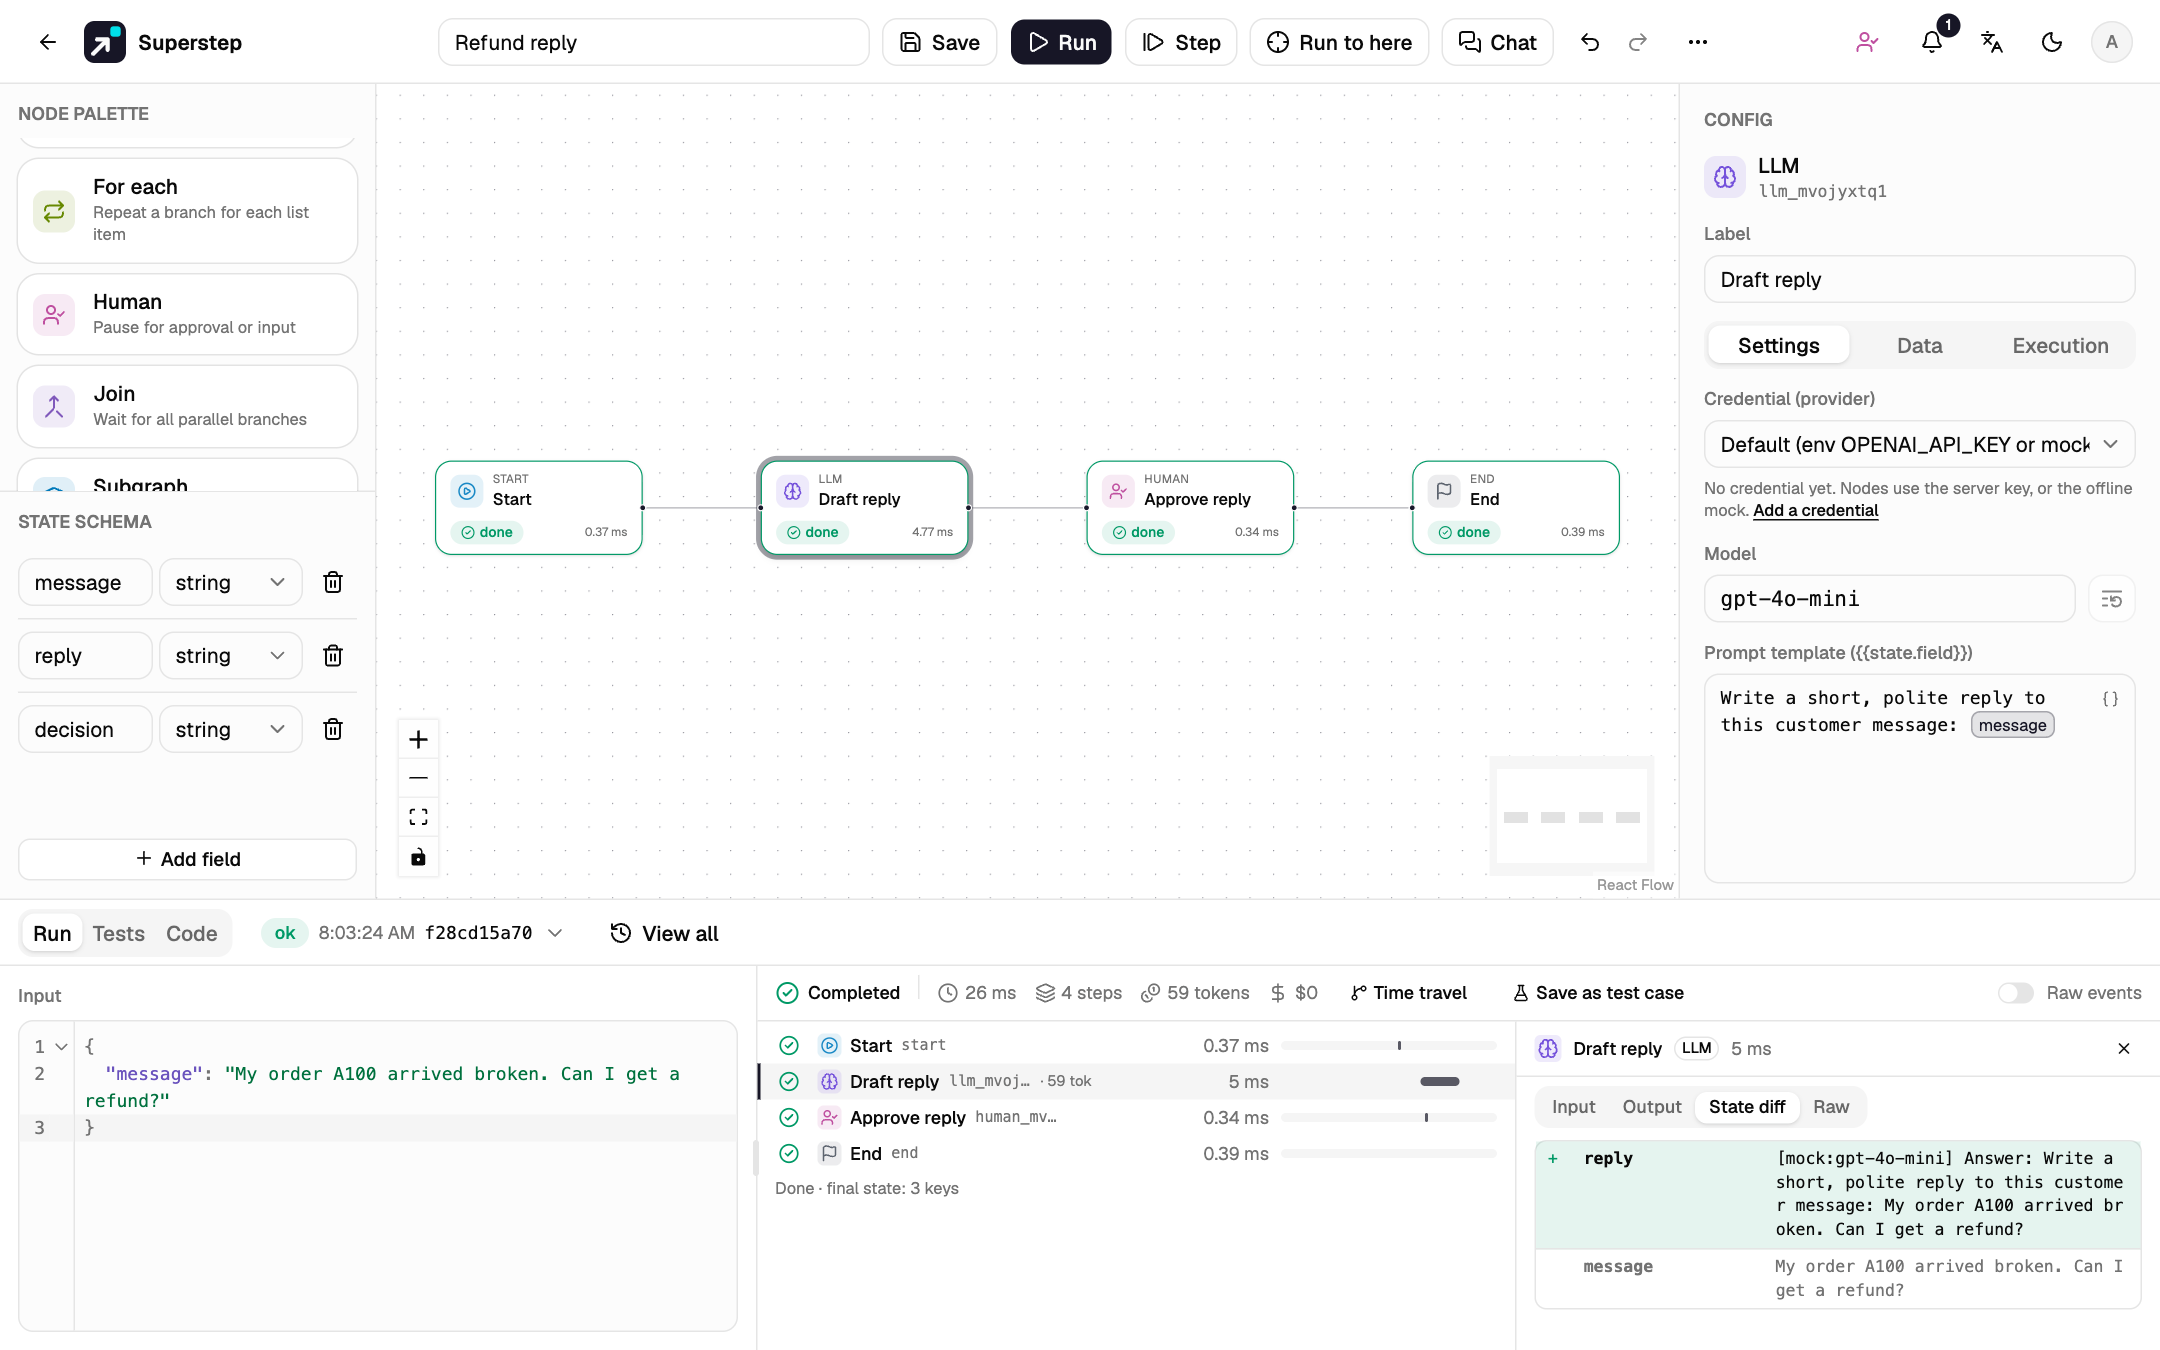
The logs (right of the input) show Completed with four steps: Start, Draft reply, Approve reply and End.
6. Read the trace
Select Draft reply on the canvas or in the logs. The step opens with
Input, Output, State diff and Raw events. The state diff shows
reply added by this step.
7. Call it over HTTP
-
Open ⋯ → API, enter a token name such as
billing-service, and select Create token. The token (wft_…) and the signing secret (whsec_…) are shown once; copy them now.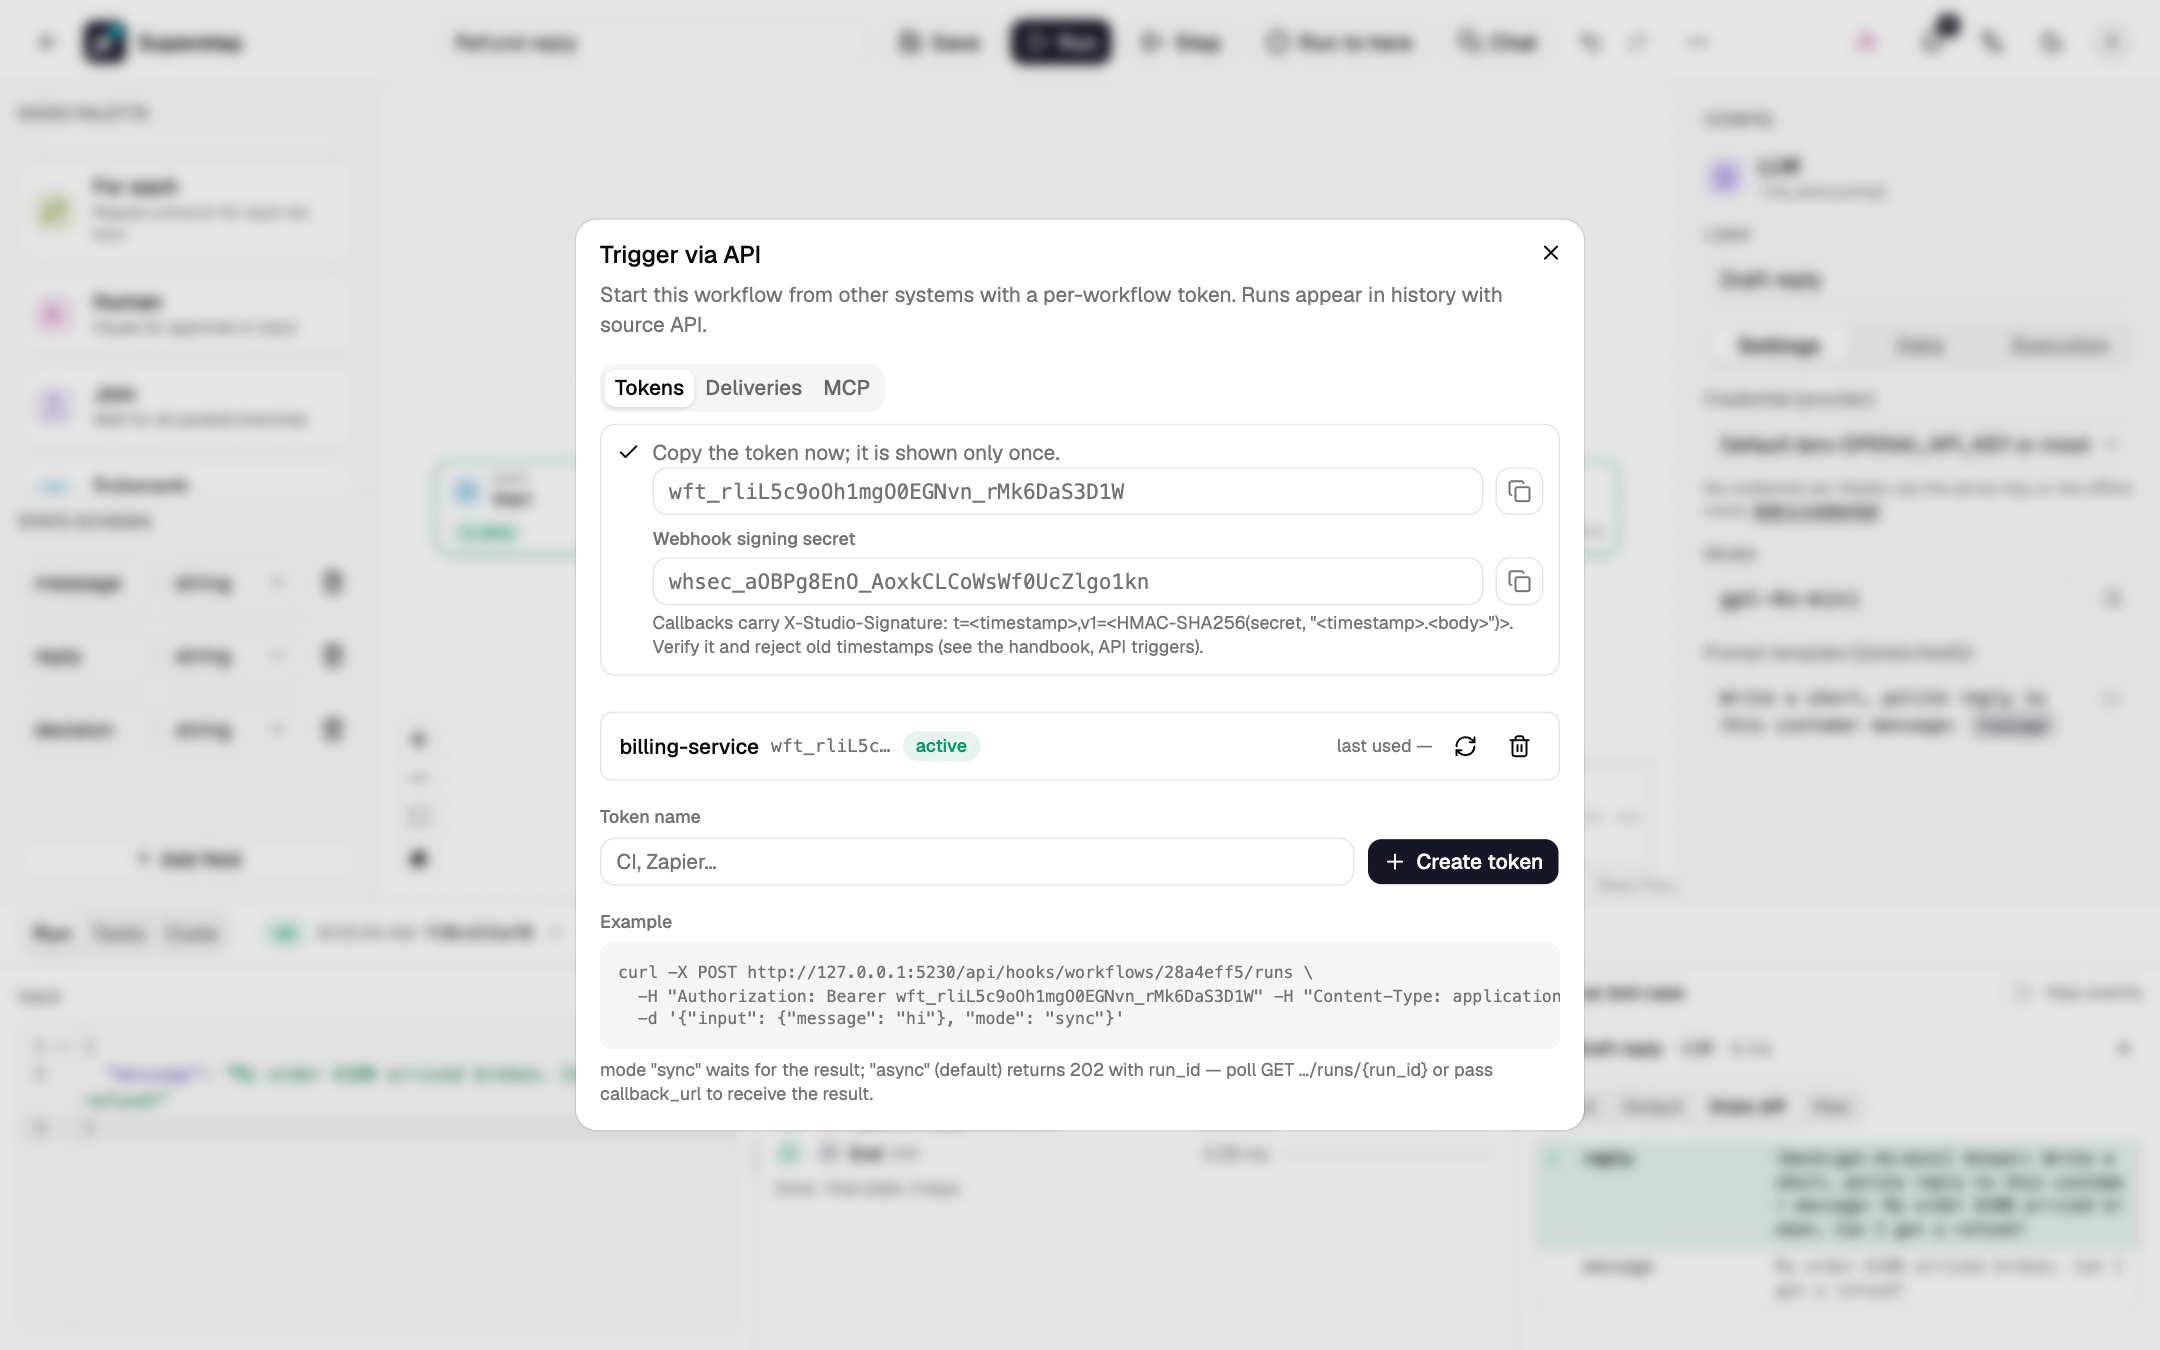
-
Start a run from a terminal. Replace
<wid>with the workflow id from the address bar andwft_…with your token:curl -X POST http://localhost:5173/api/hooks/workflows/<wid>/runs \ -H "Authorization: Bearer wft_…" -H "Content-Type: application/json" \ -d '{"input": {"message": "My order A100 arrived broken. Can I get a refund?"}}'The response is
202with arun_idand"status": "queued". -
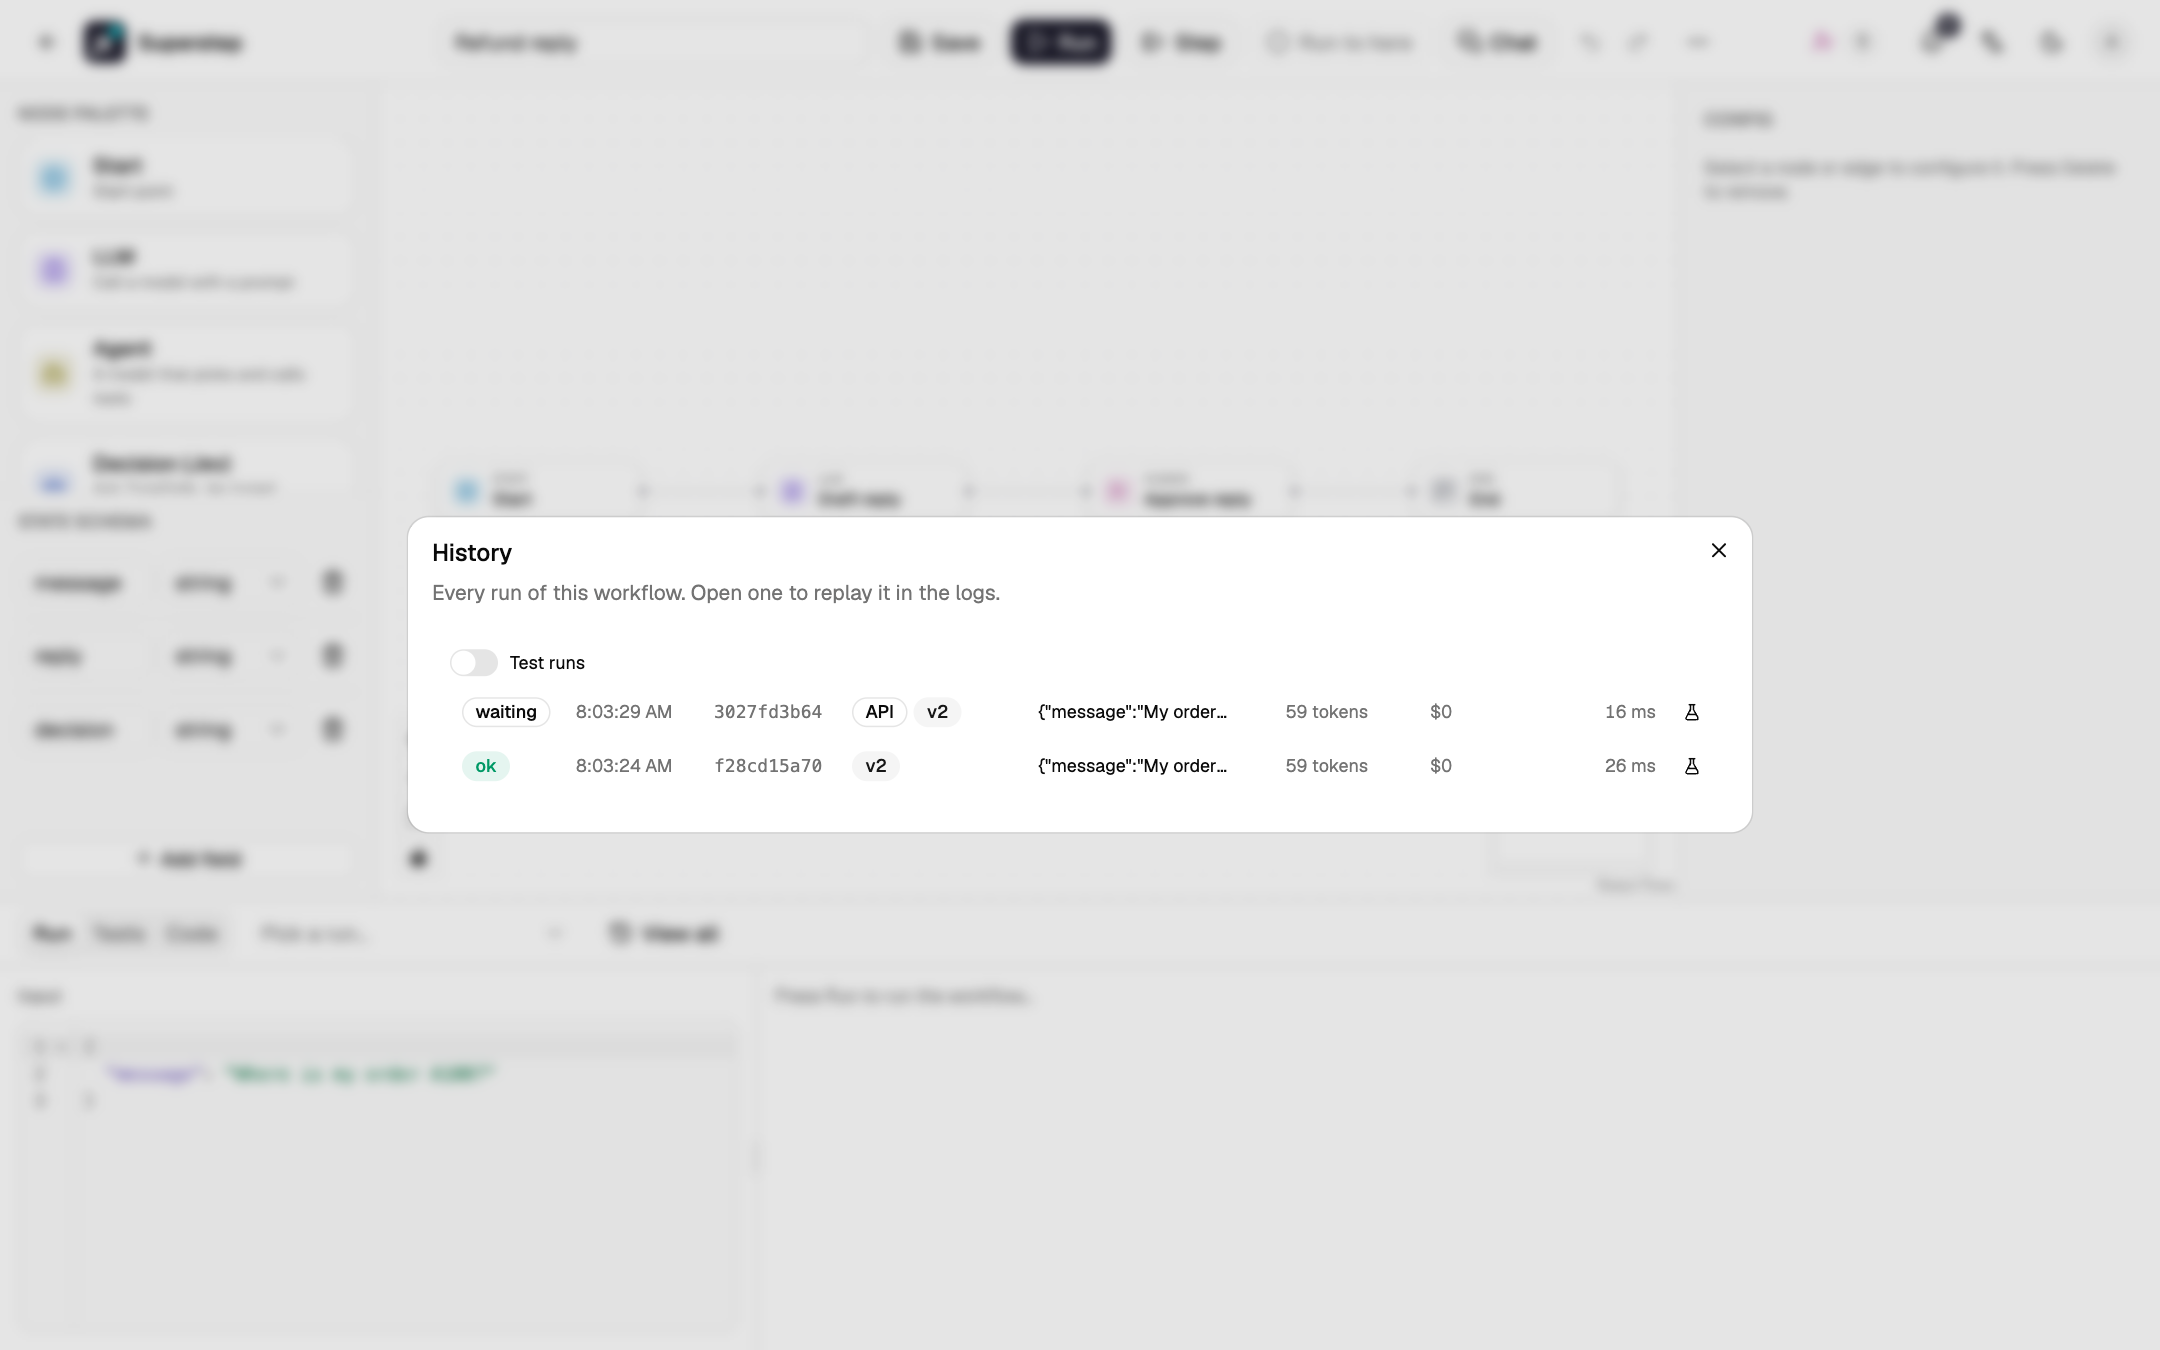
Open Run → View all (reload the page first). The API run has an API badge and status
waiting: it stopped at the Human node, like the studio run.
8. Put it on a schedule
- Open ⋯ → Schedules.
- Enter a name and the cron expression
0 9 * * 1-5(09:00 on weekdays). The dialog previews the next run times in the selected time zone. - Select Add schedule.
What you learned
- A workflow is a graph of typed nodes over a shared state; nodes read it
with
{{state.field}}and write one Output field (State and references). - Every save is a version, and every run records the version it used (Versions).
- A Human node pauses a run in
waitingand resumes it from a checkpoint; the request can also go to chat or e-mail (Human approval). - Each step of a run keeps its input, output and state diff (Runs and traces).
- A workflow token lets another service start runs, and schedules start them on a timetable (API triggers, Schedules).
Next steps
- Add a model: LLM providers.
- Branch on the decision with a Condition node: Nodes.
- Keep test cases with an input, the Human answer and what the run should show: Workflow tests.
- See the workflow as LangGraph Python and run it on its own: Export to Python.
- Send approvals to Slack, Telegram, WhatsApp, e-mail or Teams: Approval channels.
- Run the full stack with Postgres, Redis and a worker: Deploy with Compose.